Spring is a season of renewal, growth, and warmer weather. As flowers bloom and the snow melts, homeowners often turn their attention to cleaning and home maintenance. However, spring also brings a unique set of challenges to your plumbing system. The shift in temperature, increased rainfall, and natural ground movement can all affect your pipes, drains, and outdoor plumbing. Understanding what spring brings to your plumbing can help you prepare, prevent costly repairs, and keep your system running smoothly.
Sump Pump Activation and the Risk of Flooding
One of the most immediate concerns in spring is sump pump activation. With heavy spring rains, your basement may be at risk of flooding if your sump pump is not working correctly. The ground becomes saturated as snow melts and rain falls frequently, and that excess water needs a place to go. For homes with basements, sump pumps serve as the last line of defense against water intrusion.
Testing your sump pump early in the season is crucial. Simply pouring a bucket of water into the pit and making sure the pump activates can help you determine whether it is functioning properly. If the pump fails to start or is slow to remove water, that is a strong sign it may need cleaning, repairs, or even replacement. Since it is the most critical component to test during the spring season, overlooking your sump pump could result in extensive water damage and mold growth in your basement.
Pipe Expansion and Hidden Leaks
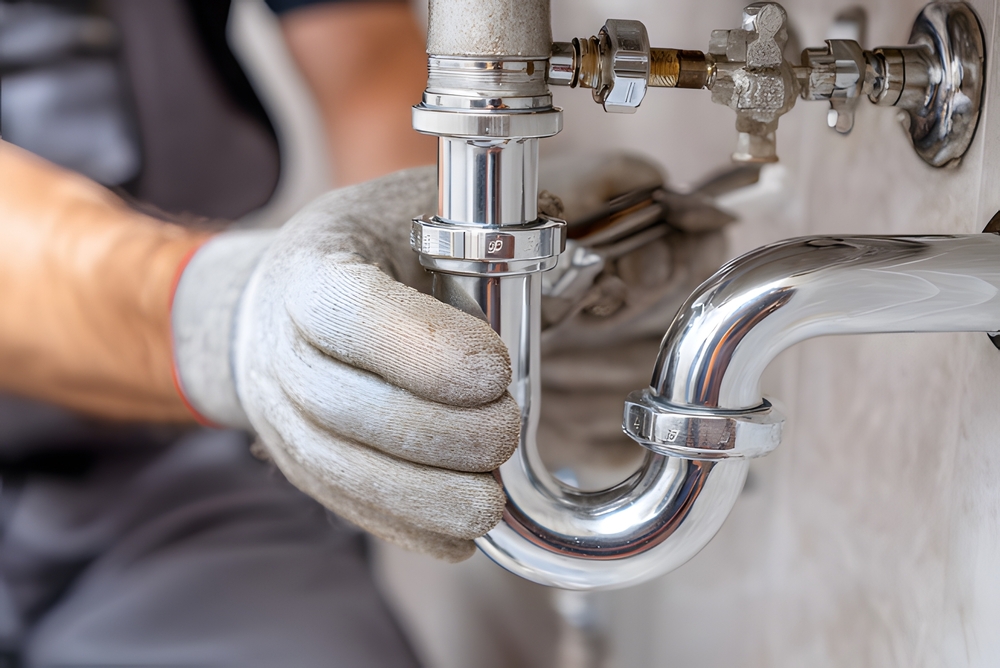
As the ground begins to thaw and temperatures rise, pipe expansion becomes another pressing concern. During winter, pipes often contract in the cold, especially those located underground or near external walls. When spring arrives, the warming temperatures cause these pipes to expand. This process of contraction and expansion can stress pipe joints and seals, which may already be weakened from the freeze-thaw cycle of winter.
The result can be newly formed leaks that were not evident during the colder months. These leaks might appear in hidden areas like crawl spaces, basements, or behind walls, making them hard to detect immediately. Homeowners should monitor their water bills closely in spring. A sudden spike in usage may indicate a leak somewhere in the system. Additionally, any signs of moisture, musty odors, or mildew indoors should be investigated, as they might stem from stressed plumbing connections.
Drain Clogging from Spring Cleaning and Runoff
Spring cleaning is not just about dusting and decluttering. It often involves washing winter grime, salt, and grit off vehicles, driveways, and even indoor floors. All this debris finds its way into your home’s drains, and if not handled carefully, it can lead to drain clogging. Floor drains, in particular, may become overwhelmed or blocked if too much sand or residue enters the system.
This kind of buildup can reduce water flow, cause slow drains, and even result in backflow if left unaddressed. Sink and shower drains also suffer during spring, especially when homeowners clean out garages and basements, sending large volumes of water and particles down the pipes. Taking the time to install drain screens and conducting a quick inspection of floor drains can help prevent larger problems. It is also wise to schedule a professional drain cleaning if you suspect persistent clogging issues.
Root Intrusion and Sewer Line Damage
Trees and plants come to life in the spring, sending out new roots in search of moisture and nutrients. While this growth is a welcome sign of the season, it can wreak havoc on your underground plumbing. Root intrusion becomes a serious concern during this time, as aggressive roots may seek out even the tiniest cracks or joints in your sewer lines.
Once inside the pipe, these roots can expand and create blockages, slowing down drainage or causing total backups. In severe cases, they can even lead to pipe collapse. Homeowners with older clay or cast iron sewer lines are especially vulnerable, as these materials are more likely to have gaps or imperfections. Warning signs include slow drains in multiple areas of the house, gurgling toilets, or unpleasant odors coming from the yard. A camera inspection from a plumbing professional can identify root intrusion early, helping avoid costly excavation later.
Outdoor Spigot Stress and Frozen Pipe Damage
When temperatures dip below freezing during winter, water left in outdoor faucets or hose bibbs can freeze, expand, and crack the pipes. However, this damage often goes unnoticed until spring, when homeowners turn the spigots back on for gardening, washing cars, or outdoor chores. This is where outdoor spigot stress becomes a hidden issue.
The first time you use your outdoor faucet in the spring, watch carefully for signs of leaks inside the wall or along the pipe leading to the spigot. Even a small crack can result in water damage behind siding or in the basement. It is good practice to inspect the faucet before and after use. If you see water dripping or pooling near the foundation, turn it off immediately and have a plumber evaluate the damage. Installing frost-free hose bibbs can also help prevent this problem in future seasons.
Increased Water Pressure and Municipal Effects
Another unexpected effect of spring is increased water pressure. As rainfall becomes more frequent and the soil becomes saturated, it can influence the performance of water mains and local plumbing infrastructure. In some cases, this may affect the water pressure in your home.
Excessively high pressure can stress your pipes and fixtures, leading to premature wear or even burst pipes. If your home has a pressure regulator, spring is a good time to check that it is functioning properly. A failing regulator may allow pressure to spike unexpectedly. Signs of high pressure include banging pipes, dripping faucets, or toilets that continue to run. Installing a water pressure gauge on an outdoor spigot can help you monitor the system and ensure it remains within a safe range, typically between 40 and 60 psi.
Gutter and Downspout Runoff Management
With spring showers and melting snow, managing gutter and downspout runoff becomes a priority. If downspouts are not correctly directing water away from your foundation, the soil surrounding your home can become oversaturated. This puts unnecessary pressure on your foundation walls and main waste line, increasing the risk of basement leaks and sewage backups.
Make sure your gutters are free of debris and that downspouts extend at least several feet away from the base of your home. Adding splash blocks or flexible extensions can help guide water toward areas where it can safely drain. This not only protects your foundation but also helps maintain the stability of your yard and landscaping. Poor drainage can contribute to erosion or settling, which may further damage buried pipes.
Water Heater Sediment and Efficiency Loss
During the colder months, your water heater works harder to supply warm water for showers, laundry, and dishwashing. This heavy use often leads to the buildup of mineral sediment at the bottom of the tank. As spring rolls in and the demand slightly decreases, it becomes the perfect time to perform maintenance on your unit.
Flushing the tank removes sediment that can interfere with heating efficiency and reduce the lifespan of the appliance. A noisy water heater, particularly one that makes popping or rumbling sounds, is a common sign that sediment has accumulated. Regular flushing not only improves energy efficiency but also helps reduce the chance of tank corrosion or leaks later in the year.
Conclusion
Spring is a season full of promise, but it also carries its own plumbing risks. From sump pump activation due to heavy rain to root intrusion and outdoor spigot stress, each aspect of your system faces different seasonal challenges. Pipe expansion, drain clogging, and increased water pressure are additional issues that homeowners often overlook until they become emergencies. Even routine tasks like cleaning gutters or flushing a water heater can make a significant difference in the health and longevity of your plumbing.
Being proactive about your plumbing maintenance in the spring helps you avoid bigger problems down the line. Keep an eye out for subtle warning signs, and don’t hesitate to consult a professional if something seems off. By addressing these seasonal concerns early, you ensure a smooth transition into the warmer months ahead, with fewer headaches and more peace of mind.
Tackling home repairs on your own can be a satisfying way to save money and gain a sense of accomplishment. Plumbing, however, is one of those areas where the do-it-yourself (DIY) route isn’t always the best or safest option. While tightening a faucet or replacing a showerhead is one thing, diving into more complex plumbing issues brings a host of risks and considerations. From legal requirements to the technical nature of the work, homeowners should carefully weigh their options before grabbing a wrench.
Understanding the Legal and Permit Implications
Before taking on plumbing repairs, it’s critical to understand the legal framework surrounding such work. In many regions, plumbing is not just a matter of practical knowledge; it’s regulated by local building codes. Permit requirements can vary widely depending on the type and scope of the work. For example, while minor fixes might not require oversight, major tasks like relocating gas lines, replacing water heaters, or altering the main sewer line typically demand a licensed professional.
Why is this important? Failing to comply with permit requirements can result in fines, failed inspections, and issues when trying to sell your home. Worse yet, if something goes wrong, your homeowner’s insurance may refuse to cover damages if it was determined that the work was unauthorized or performed without a qualified plumber. In short, doing your own plumbing might not just risk your pipes, it could risk your financial stability as well.
The Challenge of Lacking the Right Tools and Skills
Another major hurdle for DIY plumbers is the issue of equipment. Plumbing repairs often demand specialized tooling that goes far beyond the standard toolbox. Tools like high-end drain augers, pipe expanders, pex crimpers, or inspection cameras are costly and designed for professional use. Without them, even basic jobs like cutting and joining pipes or clearing a stubborn clog can become frustrating or impossible.
Some tasks also require a refined skill set, especially when it comes to working with copper piping. Soldering skills are essential for creating leak-proof joints, and using a propane torch comes with safety hazards that must not be underestimated. Incorrect soldering can lead to small, persistent leaks that may not be noticed until major damage has occurred. If you don’t already possess these abilities, learning them on the fly while water is leaking into your kitchen is not the best time.
DIY Risks and Potential Liability
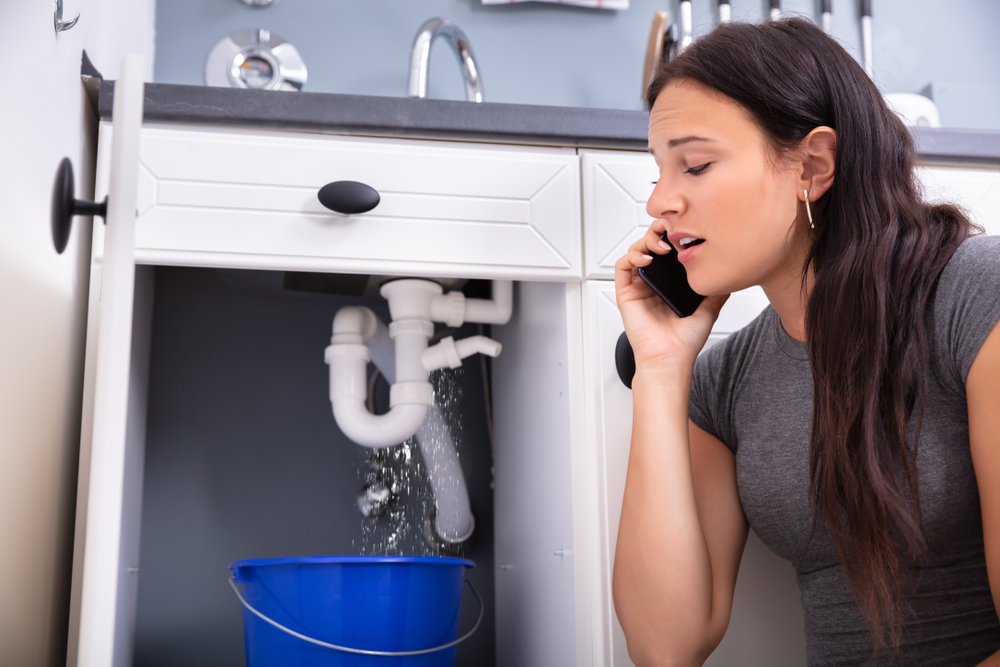
There’s a reason why professional plumbers are in such demand: mistakes in plumbing can be costly. A small leak might initially appear insignificant, but it can quickly escalate into extensive water damage, mold growth, and even structural issues. This is where liability risk becomes a serious concern. Homeowners should know that insurance policies often contain clauses that deny coverage for damage caused by unlicensed work. So if your self-installed pipe bursts and floods your basement, you might be left footing the bill.
Water damage is notoriously difficult to remediate and can result in long-term health concerns, especially if mold takes hold. Even a minor oversight, like forgetting to properly tighten a fitting or using the wrong kind of tape on a thread, can result in slow leaks that go undetected for weeks. In plumbing, there is rarely such a thing as a small mistake. Every seal, joint, and angle needs to be perfect, or the consequences can be far-reaching.
The Hidden Complexities of Plumbing Systems
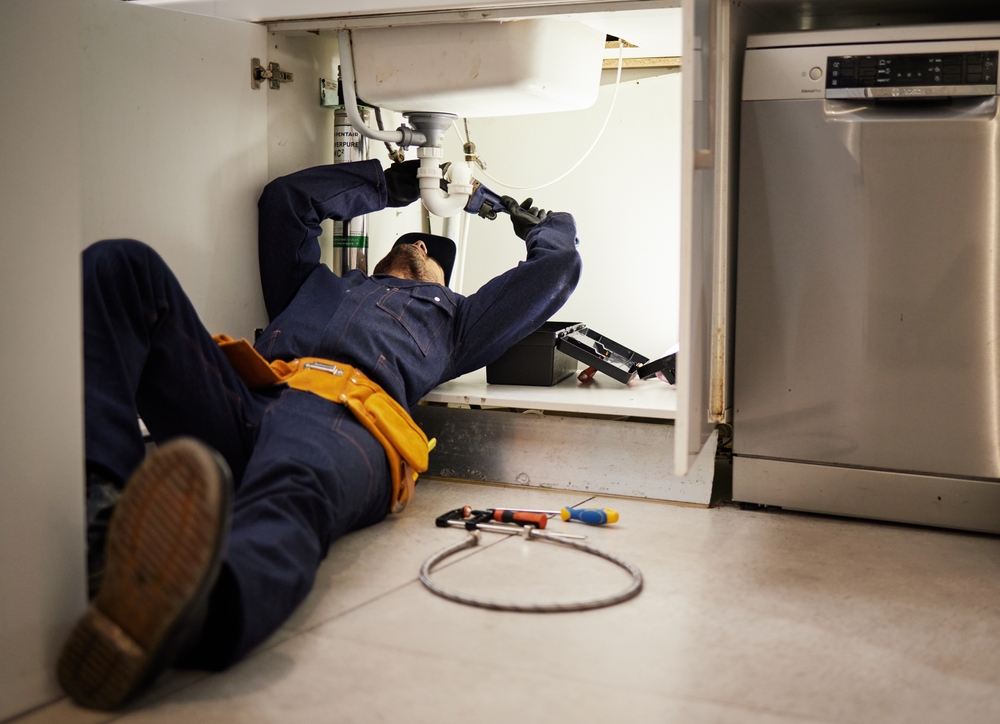
To the untrained eye, a leak under the sink might seem like a simple case of a loose pipe or worn washer. However, plumbing systems are interconnected in complex ways. A leak might actually be a symptom of a deeper issue such as high water pressure, backflow, or corrosion in the pipes. Without the right diagnostic experience, these root causes often go unnoticed. This diagnostic complexity is where DIY approaches frequently fall short.
Identifying and resolving these issues often requires more than just replacing a pipe. It involves analyzing the entire water system, from pressure regulators to pipe grading. Professionals are trained to notice signs that a DIYer might miss: subtle sounds, discoloration, or material fatigue. They also have access to diagnostic tools like infrared cameras and pressure gauges that help detect hidden problems. Guesswork in plumbing is dangerous and often expensive.
The Cost and Consequence of Poor Planning
Many homeowners choose DIY plumbing to save money. But when you add up the time spent researching, shopping for parts, fixing mistakes, and cleaning up, the savings may not be as significant as they hoped. There’s also the issue of shut-off accessibility. Before any plumbing task, it’s critical to know exactly where your main water shut-off valve is, whether it’s functional, and if you can access it quickly in an emergency. Not being prepared to shut off water in time is a common mistake that can lead to serious flooding.
Then there’s the question of time vs. cost. Is the time spent learning, prepping, and troubleshooting really worth it compared to hiring a professional who will do the job correctly and often provide a warranty on their work? Plumbers can usually complete in one hour what might take a homeowner an entire day. And if something goes wrong during or after the job, professionals are liable for the repair, not you.
Plumbing emergencies are also where DIY can be particularly hazardous. In a situation where a “quick fix” leads to a burst pipe or a backed-up sewer, immediate response is critical. If you’re not able to resolve the issue on your own, the delay in getting professional help could lead to thousands of dollars in damage. This is why having a trusted plumber in your contacts is essential. Emergency response is one of the biggest advantages of using a licensed professional.
Conclusion
There is a time and place for do-it-yourself projects, and for minor plumbing issues, a confident and prepared homeowner might be able to make a safe repair. However, once the work involves soldering, specialized tooling, or the potential for widespread water damage, the risks start to outweigh the rewards. Legal considerations, such as permit requirements, add another layer of complexity that can’t be ignored.
Furthermore, plumbing is rarely as simple as it seems. What looks like a straightforward leak may stem from a deeper problem, and without the right diagnostic approach, a temporary fix can hide a much larger issue. From the tools you don’t own to the liability risk you might be taking on, DIY plumbing should never be attempted without careful consideration and planning.
Ultimately, the best approach is to know your limits. Keep up with routine maintenance, understand your home’s shut-off systems, and learn to recognize the signs of a plumbing issue early. But when the job is big, complicated, or urgent, call a professional. Your home, your finances, and your peace of mind are all worth protecting.
As we step into 2026, homeowners across the country are rethinking how they approach comfort, conservation, and convenience, especially when it comes to their plumbing systems. The days of ignoring minor leaks or sticking with outdated water heaters are gone. Modern plumbing projects not only add value to your home but also boost efficiency, safety, and even your overall well-being. Whether you’re tackling small upgrades or major renovations, the plumbing innovations of 2026 offer smart solutions for every budget. Let’s dive into some of the best plumbing projects to consider this year.
Smart Leak Detection: The Unsung Hero of Home Safety
One of the smartest decisions any homeowner can make in 2026 is installing a whole-home smart water monitor. Products like Flo by Moen or Phyn are transforming the way we manage water usage and protect our homes from catastrophic damage. These smart leak detection systems are installed on your main water line and use AI to understand your daily water usage. If an irregularity, such as a burst pipe or a slow pinhole leak, is detected, the system can automatically shut off your water, potentially saving you thousands in repairs and insurance deductibles.
These devices also provide real-time updates via smartphone apps, allowing homeowners to keep tabs on their water consumption even when away on vacation or business. With weather patterns becoming more unpredictable and plumbing systems aging across the country, this technology is a non-negotiable investment for peace of mind in 2026.
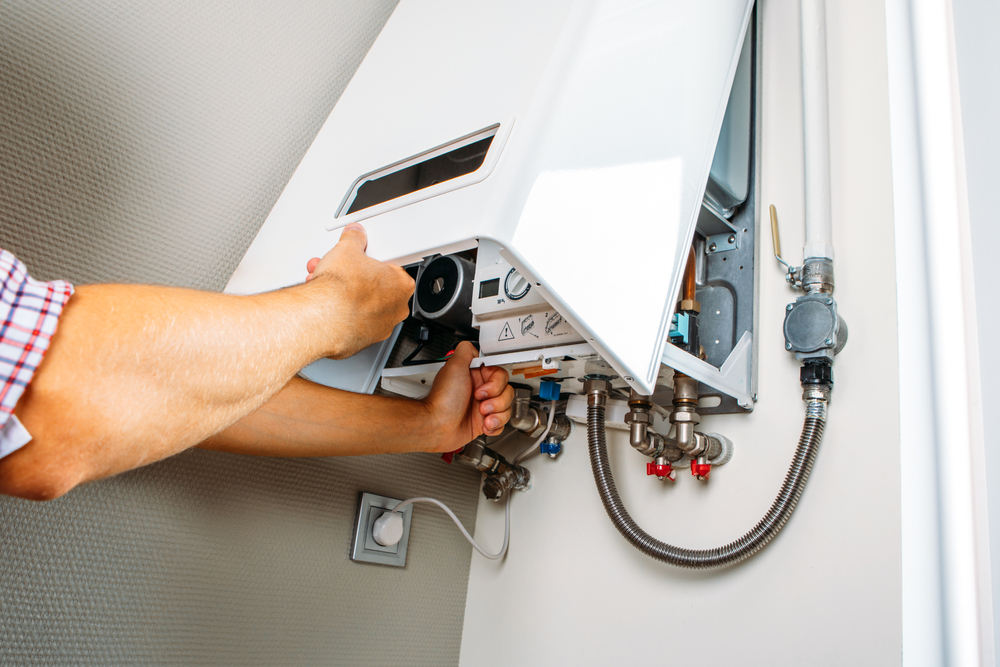
Hybrid Heat Pump Water Heaters: Efficiency Redefined
Traditional water heaters are on their way out. In their place, hybrid heat pump water heaters are becoming the gold standard for 2026. These innovative systems extract ambient heat from the surrounding air and transfer it to the water, using a fraction of the energy required by conventional units. The result is a system that’s not only efficient but also eco-friendly and cost-effective.
Homeowners in warmer regions like Gilbert, Arizona will see an extra benefit: these heaters help cool down surrounding spaces such as garages while in operation. They’re particularly suited for homes with moderate to high hot water usage and can slash utility bills significantly. With tightening energy regulations and growing awareness of carbon footprints, hybrid systems are more than just a smart upgrade; they’re a future-ready choice.
Whole-Home Water Filtration & Softening: Protect Your Plumbing
Hard water is more damaging than it appears. The high mineral content can lead to scale buildup that affects the performance and lifespan of your plumbing system, appliances, and even your skin and hair. In 2026, homeowners are prioritizing the installation of whole-home water filtration and softening systems to address this long-standing issue.
Whether you choose a salt-based water softener or a Reverse Osmosis (RO) filtration unit, the benefits are tangible. Your dishwasher runs more efficiently, your clothes come out softer, and your water heater won’t struggle with sediment accumulation. Modern systems also come with low-maintenance designs, often including smart monitoring features that let you know when filters need replacing or when it’s time for a salt refill. This kind of upgrade preserves your plumbing infrastructure while elevating daily living standards.
In 2026, upgrading your fixtures isn’t just about aesthetics. The latest models are designed with hygiene and sustainability in mind. Touchless faucets, for instance, reduce the spread of germs by eliminating the need to touch handles. This is especially useful in bathrooms and kitchens where cleanliness is paramount.
High-efficiency toilets are another easy win for eco-conscious households. Modern dual-flush toilets use just 1.28 gallons or less per flush, compared to the outdated models that use up to 3.5 gallons. When paired with aerated showerheads and efficient dishwashers, these upgrades can significantly lower your monthly water bill while reducing your environmental impact.
As conservation incentives increase and water scarcity becomes a more pressing issue, these types of fixtures will be essential for maintaining both utility savings and ecological responsibility.
Sewer Camera Inspections: Prevent Disasters Before They Happen
Out of sight, out of mind is no longer an excuse when it comes to your sewer lines. One of the fastest-growing plumbing trends for 2026 is the proactive scheduling of sewer camera inspections. These services allow plumbers to insert a high-definition camera into your pipes, providing a live feed of what’s going on underground.
The benefits are substantial. Homeowners can detect root intrusion, corrosion, bellies, or even minor clogs before they escalate into full-blown sewage backups. This is particularly important around the holiday season or family gatherings, when your plumbing system is under more stress. Regular inspections help you plan repairs on your own terms instead of dealing with emergency calls and expensive restoration work.
Tankless “On-Demand” Upgrades: Endless Hot Water, Instantly
For families that always seem to run out of hot water, the solution in 2026 is clear: tankless water heaters. Unlike traditional tanks that store and constantly heat 40 or 50 gallons of water, tankless units heat water on demand as it flows through the system. This not only eliminates the wait time for hot water but also reduces energy consumption since there’s no standby heat loss.
These systems are compact, wall-mounted, and perfect for smaller homes or apartments where space is at a premium. Yet they’re powerful enough to serve larger households with multiple bathrooms. Investing in a tankless unit is about comfort and efficiency, but it also enhances resale value; prospective buyers increasingly see it as a premium home feature.
Slab Leak Prevention: Protect Your Foundation
In many parts of the country, homes are built directly on concrete slabs. While this foundation style has advantages, it also presents unique challenges, chief among them being slab leaks. These occur when water lines running beneath the concrete begin to leak due to corrosion, abrasion, or shifting soil. Left unchecked, they can cause serious structural damage.
The new approach in 2026 is non-invasive leak detection. If you’ve noticed warm spots on your floor or an unusually high water bill, it could be an early sign. Specialized tools can now pinpoint the exact location of leaks without the need to jackhammer your floors. Addressing these issues early preserves your home’s integrity and prevents costly foundation repairs down the road.
Braided Stainless Steel Supply Lines: Small Change, Big Impact
Sometimes the most effective upgrades are the simplest. If your home still uses rubber or plastic supply hoses behind toilets, sinks, or washing machines, it’s time for an easy weekend project: switch them out for braided stainless steel supply lines.
These reinforced hoses are far more durable and resistant to bursts, especially during pressure spikes or rapid temperature changes. Considering the relatively low cost and minimal effort required for installation, this is a high-value, DIY-friendly project that pays for itself many times over in peace of mind and leak prevention.
Spa-Inspired Shower Upgrades: Wellness at Home
A trend that’s gained momentum this year is the integration of wellness into home design. One way homeowners are embracing this is by transforming ordinary bathrooms into spa-like retreats. Installing rainfall showerheads, body jets, and thermostatic mixing valves that keep water temperature consistent are popular upgrades in 2026.
These changes are more than just aesthetic. They elevate the shower experience, improve comfort, and add a touch of luxury that boosts both personal well-being and home appeal. For homeowners looking to invest in self-care while adding value to their property, this is a must-consider project.
Trenchless Pipe Relining: Modern Solutions for Aging Pipes
Many homes still rely on outdated piping that is prone to corrosion or cracking. The good news is that replacing these doesn’t necessarily require ripping up your yard. Trenchless pipe relining is now widely available and involves inserting a resin-coated liner into the existing pipe. Once cured, it creates a new, durable “pipe within a pipe.”
This method is faster, less disruptive, and often more affordable than traditional excavation-based repairs. It’s particularly useful for older properties or those with landscaping and hardscaping that you’d prefer not to disturb. With pipe relining, you gain decades of additional pipe life with minimal inconvenience.
Conclusion
Plumbing is no longer just about moving water from point A to point B. In 2026, it’s about integrating smart technology, maximizing energy efficiency, improving hygiene, and ensuring long-term protection for your home. Whether you’re replacing old supply lines or installing a high-tech water monitoring system, each of these projects contributes to a safer, more comfortable, and more valuable home. Now is the perfect time to plan and prioritize your plumbing upgrades for the year ahead. Investing today means fewer surprises and better performance tomorrow.
Replacing a water heater is a significant decision for any homeowner. Whether prompted by a sudden failure or a long-overdue upgrade, it’s essential to understand the full range of considerations that come with the process. A water heater is responsible for many daily household comforts, from hot showers to efficient dishwashing and laundry. Ensuring you select the right model involves more than just matching the size of your old unit. You’ll need to evaluate your household’s hot water usage, understand energy efficiency, and ensure compliance with local installation codes. With several different water heater types and fuel options available, the choices can quickly become overwhelming without a clear understanding of what each factor means. Here’s what you need to know before making that investment.
Before choosing a new water heater, it’s crucial to determine your home’s fuel source compatibility. The majority of water heaters operate on gas or electricity, but propane is also an option in some homes. If your current heater runs on natural gas, sticking with gas is typically the most straightforward and cost-effective option. However, upgrading to a more efficient model within the same fuel category may bring significant energy savings.
Electric water heaters are often easier to install since they don’t require venting, but their operational cost can be higher depending on local utility rates. Propane models are less common and often used in rural areas without natural gas access. Transitioning from one fuel type to another is possible, but it usually involves additional work and cost such as upgrading gas lines, installing new vents, or updating your electrical panel. Understanding which fuel types your home supports, and the implications of switching, is a vital first step in choosing your new water heater.
Capacity Sizing (Matching Gallons or GPM to Household Need)
Choosing the correct size water heater is essential to avoid the frustration of running out of hot water or wasting energy by overheating more water than necessary. For storage tank models, capacity is measured in gallons. Most households find that a 40 to 50-gallon tank meets the needs of two to four people, but larger families may require 75 gallons or more.
For tankless systems, which heat water on demand, sizing is based on gallons per minute (GPM). A typical shower might use 2 GPM, so a household that expects to run two showers and a dishwasher simultaneously would require a unit rated for at least 6 GPM. Accurately estimating your home’s peak water usage ensures your system delivers consistent hot water without overworking. Consulting with a professional or using online calculators can help you assess the appropriate capacity sizing for your home and habits.
Tankless vs. Tank vs. Hybrid (Choosing the Technology)
Understanding the differences between tank, tankless, and hybrid water heaters helps clarify which type is best for your home. Traditional tank models store and continuously heat a reservoir of water. They are generally less expensive up front and simple to install, but they can lose heat over time, leading to higher energy bills.
Tankless systems, on the other hand, only heat water as needed. This on-demand system can lower your energy consumption significantly and provide endless hot water. However, they often have a higher upfront cost and may require upgrades to your home’s gas line or electrical system.
Hybrid water heaters combine elements of both, using a heat pump to extract warmth from the surrounding air and transfer it to the water. These systems offer high efficiency and lower operating costs but require more space and can be sensitive to their installation environment. Choosing the right technology involves weighing installation logistics, your household’s usage patterns, and your long-term energy savings goals.
Energy Efficiency Ratings (Energy Factor/UEF)
Energy efficiency is a top priority for many homeowners, both for cost savings and environmental impact. Water heaters are rated by metrics such as the Energy Factor (EF) or the newer Uniform Energy Factor (UEF). These numbers indicate how efficiently a unit converts fuel into hot water and how much heat is lost during storage or distribution.
Higher ratings mean better efficiency and lower monthly bills. Tankless models often score highly due to their on-demand nature, while heat pump hybrids also offer excellent performance. Although high-efficiency units may cost more initially, they can provide substantial savings over the lifespan of the appliance. Be sure to look for the ENERGY STAR label and compare UEF ratings within the same category of water heaters to make a well-informed choice that balances cost and performance.
Venting Requirements (Especially for Gas/Tankless Units)
Venting is a key consideration if you’re installing a gas or tankless water heater. These models emit combustion gases that must be safely expelled from your home. Traditional gas tank models typically use vertical venting through a chimney or flue. Modern high-efficiency models often require power venting or direct venting, which may necessitate wall modifications or electrical upgrades.
Tankless gas models frequently have stricter venting requirements because of their powerful burners and rapid operation. Improper venting can pose serious safety risks and affect the unit’s performance. Always check whether your home can accommodate the required venting system for your chosen model. Ensuring proper ventilation not only protects your household but also helps the unit run efficiently and last longer.
Installation Code Compliance (Local Permitting and Regulations)
Water heater installation is subject to local building codes and regulations. These codes are designed to ensure safety, energy efficiency, and environmental compliance. Many municipalities require a permit for replacement or new installation, and some areas have adopted specific standards for energy use or seismic strapping, particularly in earthquake-prone regions.
Licensed plumbers are typically familiar with these requirements and can help ensure your installation meets all legal and safety standards. DIY installations may be tempting for the handy homeowner, but failure to comply with code can result in fines, voided warranties, and safety hazards. Additionally, when selling your home, an improperly installed water heater can cause complications during inspection. Taking the time to research and follow all relevant codes and permit procedures is a critical part of the replacement process.
Recovery Rate (How Fast the Tank Heats a New Batch)
The recovery rate of a water heater indicates how quickly it can heat a fresh batch of cold water. This is especially important for larger households or those with high hot water demand. Gas water heaters generally have a faster recovery rate than electric models, making them more efficient at handling back-to-back showers or laundry loads.
For example, a standard 50-gallon gas heater might recover in about 30 to 40 minutes, while an equivalent electric unit could take over an hour. If your household frequently runs out of hot water, selecting a model with a higher recovery rate, or moving to a tankless system, can improve comfort and convenience. This factor is especially vital in homes with children or multiple bathrooms, where morning routines rely on a steady hot water supply.
Warranty and Lifespan (Protecting Your Investment)
Investing in a quality water heater also means considering the warranty and expected lifespan. Most standard tank water heaters last 8 to 12 years, while tankless models can operate for 15 to 20 years with proper maintenance. Hybrid models often fall somewhere in between. Manufacturer warranties typically range from 6 to 12 years, depending on the brand and model.
A longer warranty often reflects higher quality components and more durable construction. While extended warranties may add to the upfront cost, they provide peace of mind and can protect you from unexpected repair or replacement expenses. Keep in mind that proper maintenance, such as flushing the tank or descaling a tankless unit, plays a major role in maximizing your water heater’s longevity and keeping the warranty valid.
Conclusion
Replacing your water heater involves more than picking out a new tank and calling a plumber. It’s a decision that affects your home’s comfort, energy usage, and monthly bills for years to come. From understanding fuel source compatibility and capacity sizing to evaluating tankless vs. tank vs. hybrid technologies, every choice matters. Energy efficiency ratings help guide environmentally and budget-conscious decisions, while venting requirements and installation code compliance ensure safety and legality. Recovery rate determines how well your system can meet your family’s daily demands, and warranty and lifespan considerations protect your investment.
Taking the time to research and plan accordingly can save you from costly mistakes and ensure you choose a water heater that serves your household efficiently and reliably. When in doubt, consulting with a licensed professional can provide valuable guidance and help tailor your decision to your specific needs and local regulations. With the right approach, your next water heater will not only deliver consistent hot water but also offer peace of mind for years to come.
Plumbing systems are among the most critical components of any home. They bring in fresh water, remove waste, and make modern conveniences possible. Unfortunately, they’re also one of the most expensive systems to repair when things go wrong. Neglect or small oversights can lead to burst pipes, water damage, mold, or even structural issues. The good news is that with proper care and preventative plumbing maintenance, you can sidestep these issues before they become major headaches. Below are key areas of focus to help you avoid costly home repairs for your plumbing system.
Water Pressure Regulation: A Quiet but Crucial Factor
Many homeowners are unaware of the role that water pressure plays in the long-term health of their plumbing. Excessive pressure may seem like a good thing when you’re enjoying a strong shower, but over time, it wears down your pipes, joints, faucets, and appliances. High water pressure can lead to leaks, pipe bursts, or early appliance failure, particularly in dishwashers and washing machines.
Water pressure regulation is a simple fix that can save thousands in repair costs. A licensed plumber can install a pressure regulator valve to maintain safe levels throughout the home. Monitoring your water pressure annually and keeping it within the recommended 40-60 psi range is essential. If you hear banging noises in the walls or experience inconsistent pressure, it’s time to investigate. Don’t wait for a pipe to rupture in the middle of the night.
Annual Water Heater Flush: Prevent Sediment Buildup and Extend Life
Your water heater quietly serves you every day, but its efficiency and lifespan are threatened by sediment accumulation. Over time, minerals in the water, particularly calcium and magnesium, settle at the bottom of the tank. This buildup reduces heating efficiency and can cause overheating, strange noises, or premature failure. Left unchecked, the heater may leak or rupture, requiring an expensive replacement.
Scheduling an annual water heater flush is one of the most cost-effective maintenance tasks you can perform. This process clears out sediment, improves heating efficiency, and extends the life of the appliance. If you notice discolored hot water, a popping sound from the tank, or inconsistent temperatures, your heater likely needs attention. Don’t overlook this yearly maintenance; it’s simple but critical.
Drain Snake / Snaking Maintenance: Clearing Problems Before They Escalate
Clogged drains are among the most common household plumbing issues, and they rarely resolve themselves. Ignoring a slow-draining sink, tub, or shower can eventually lead to full blockages, backups, or burst pipes. Kitchen sinks are especially prone to clogging due to improper grease disposal and food waste buildup, while bathroom drains collect hair and soap residue.
Regular drain snake or snaking maintenance helps clear blockages before they escalate. This method is far safer for your plumbing than chemical drain cleaners, which can corrode pipes and cause more harm than good. If you notice any slowdown in drainage, act early. A plumbing snake is an affordable tool, and many minor clogs can be handled by homeowners. However, recurring issues may signal a larger problem in the main line, requiring professional assessment.
Leak Detection Routine: Catching Hidden Problems Early
Leaks are notorious for going undetected until significant damage has already occurred. A small drip behind a wall or beneath a sink can lead to mold, wood rot, or weakened structural elements. Worse, hidden leaks often increase water bills subtly enough to go unnoticed for months. To avoid these silent threats, a proactive leak detection routine is vital.
Conducting monthly inspections under sinks, around appliances, near toilets, and along visible piping can help you spot signs of trouble. Look for moisture, corrosion, warped wood, or mildew. Listening for unexplained hissing or dripping can also be revealing. New smart leak detectors can monitor water usage patterns and alert you to abnormalities via smartphone. Investing in this technology is a smart move for any homeowner, especially in older houses.
Seasonal Considerations: Winterization and Pipe Protection
When temperatures drop, water inside your pipes can freeze and expand, causing catastrophic bursts. Hose bibs and exposed piping are especially vulnerable during winter months. Hose bib winterization is a crucial seasonal task to prevent freezing. Disconnecting hoses, draining outdoor faucets, and installing insulated covers can prevent expensive damage to your home’s exterior plumbing.
Piping insulation is another line of defense. Basements, crawl spaces, garages, and attics often contain unprotected lines that need attention. Foam pipe insulation is affordable, easy to install, and highly effective at preventing freezing and condensation. If your region is prone to deep freezes, consider upgrading to heat tape or a thermostatically controlled heating cable for added protection. This simple preparation can spare you from an emergency plumbing call on a bitterly cold morning.
Grease Disposal Awareness: Keep Your Kitchen Flowing
Kitchen drains face daily abuse, much of which stems from improper grease disposal. Pouring fats, oils, and grease down the drain might seem harmless when the liquids are hot, but as they cool, they congeal and stick to pipe interiors. Over time, this leads to stubborn clogs that no plunger can clear. Worse, it can contribute to fatbergs in municipal systems and create backups in your own line.
Practicing grease disposal awareness is essential. Always pour grease into a sealable container and dispose of it in the trash once solidified. Wipe greasy pans with a paper towel before rinsing. Encourage everyone in the household to follow these habits. Avoiding kitchen clogs is far easier than dealing with an overflowing sink or a ruined holiday dinner due to a backed-up drain.
Sump Pump Testing: Guarding Against Basement Floods
Basement flooding is a nightmare that often results in extensive damage to flooring, walls, and possessions. The sump pump is your first line of defense, especially in flood-prone areas or homes with below-grade spaces. Yet many homeowners neglect to test their sump pump until it’s too late.
Sump pump testing should be part of your seasonal checklist, especially before the rainy season or snowmelt. To test, pour a bucket of water into the sump pit and ensure the pump activates and drains the water effectively. Also, inspect the discharge pipe outside to confirm it’s clear and positioned properly. If your system includes a battery backup, verify that it is charged and functional. Regular testing is your best protection against an expensive cleanup and insurance claim.
Conclusion
Maintaining your home’s plumbing system doesn’t require a professional license, just awareness and consistency. By addressing water pressure regulation, committing to an annual water heater flush, performing regular drain snake maintenance, and staying alert through a leak detection routine, you can prevent many issues before they surface. Seasonal steps like hose bib winterization and piping insulation will protect your system during cold months, while daily habits like grease disposal awareness keep your kitchen clear. Don’t forget the critical importance of sump pump testing, which can prevent devastating water damage in your basement.
Taking proactive steps now ensures that your plumbing system remains reliable, efficient, and cost-effective. Think of it not just as maintenance, but as an investment in your home’s value and your peace of mind.